Last updated: October 2026 · Next Phase Solar team
Bird mesh around solar panels isn’t complicated in principle: a strip of wire mesh, clipped to the panel frame, closing the gap underneath. So it is fair to ask whether you need to pay someone to do it.
This guide sets out what each option costs in Australia in 2026, what a professional job should include, the risks that matter, and a simple way to decide.
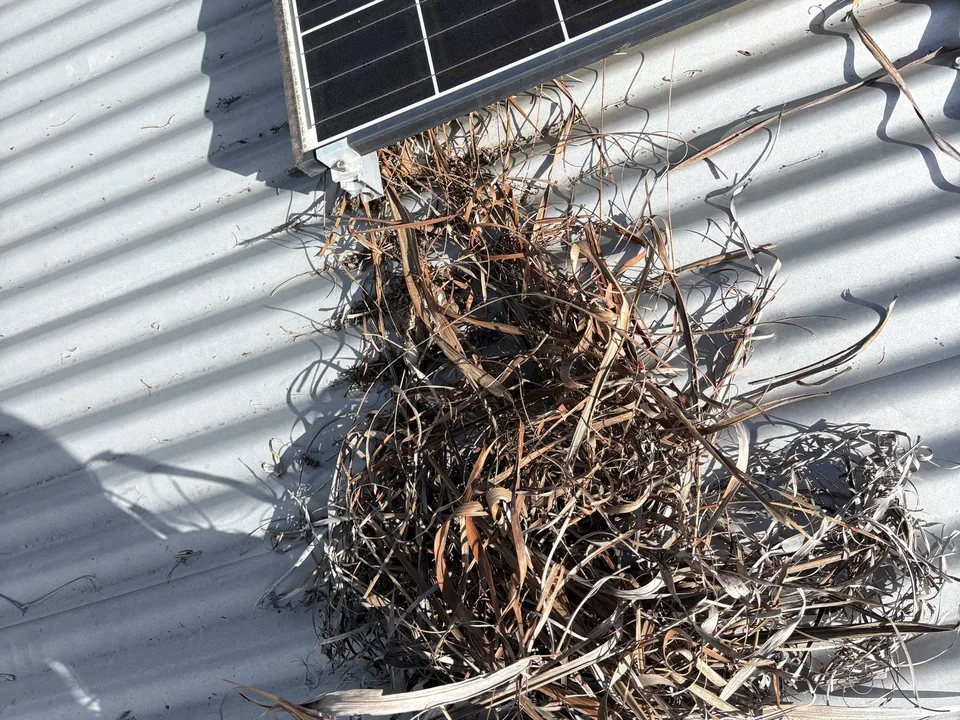
Before: the gap under the panels is open.
After: mesh fitted around the edge.
What a DIY kit costs
We looked at mesh kits sold in Australia on 9 October 2026. Prices include GST. We are listing them by type, not by brand, because prices and stock change quickly.
| Kit type | Roll size | Fixings included | Price | Per metre |
|---|---|---|---|---|
| 304 stainless with black UV PVC | 30 m × 160 mm | None, 50 or 100 nylon clips, depending on the option | $80 to $120 | about $2.70 to $4.00 |
| Steel mesh sold as “stainless”, grade not confirmed by the seller | 40 m × 205 mm | 100 aluminium J hooks with washers, ties and gloves | about $160 | about $4.00 |
| 304 stainless with UV PVC | 30 m × 210 mm | 100 fasteners | about $180 | about $6.00 |
A few things to notice:
- The cheapest kit isn’t always the cheapest job. A kit without clips needs clips bought separately. A narrow roll may not cover the gap on your roof.
- Check the grade. A listing can call a kit stainless in the title and “steel” in the description. Ask for the grade in writing, and do the magnet test when it arrives.
- Check the warranty and who gives it. The kits we saw ranged from no clear warranty provider to a 5 or 6 year manufacturer warranty.
Tip: One roll of 30 to 40 m usually covers a typical home with 10 to 20 panels. Measure the perimeter of your panel groups before you buy. Our installation guide shows how.
The other costs of DIY
The kit is not the only cost:
- A safe way up and a safe way to work on the roof. A proper ladder, footwear and, for anything beyond a low single storey roof, fall protection.
- Cleaning gear and protection: gloves, a P2 respirator, a sprayer, bags for the nest material.
- Tools: tin snips or side cutters, pliers, UV rated or stainless cable ties.
- Your time. Cleaning out underneath, measuring, cutting and clipping takes longer than it looks, especially the first time.
What professional installation costs
Installed prices vary with the number of panels, the roof, the height and how much mess there is under the panels. Why Solar, an Australian solar company, publishes these ranges on its blog. The figures are theirs:
| Job | Price range (Why Solar) |
|---|---|
| Standard home, 10 to 20 panels | $350 to $700 |
| Large system, 20 to 40 panels | $700 to $1,200 |
| Professional install, per metre | $18 to $30 |
| Clean plus mesh | $500 to $900 |
| DIY kit, 30 m roll and clips | $150 to $250 |
| Steep roofs or large systems | “towards $1,000 to $1,500” |
Most installers price by the metre around the edge of the panels, because that is what takes the time and the material. A two storey roof usually costs more, for the access gear and the extra care.
What a professional job should include
If you are comparing quotes, a good installer should do all of this, not just clip mesh on:
- Check for active native bird nests before anything is sealed. See below.
- Clear out the nests, sticks and droppings from under the panels.
- Clean safely. Wet the droppings first, wear a P2 respirator, and never dry sweep.
- Clean the panels, so the array is sealed up clean.
- Fit stainless mesh with clip on fixings, no drilling into the panel frames.
- Fit it tight to the roof and the frame, with corners and joins tied off so there are no gaps.
- Leave drainage and airflow clear, so water can run off and the panels can breathe.
- Give a written warranty, and say who gives it: the installer for the workmanship, the manufacturer for the mesh.
The risks that matter
Dried bird droppings and your lungs
Under solar panels, pigeon droppings build up and dry out. Disturbing dry droppings can put dust in the air. WorkSafe Queensland warns about diseases from birds, including psittacosis, and gives clear advice for working with bird and bat droppings:
- Wear gloves and a properly fitted particulate respirator, a disposable P2 or higher, when disturbing dried droppings.
- Before cleaning, apply a light mist of plain or soapy water to the droppings.
- Avoid methods that spread dust: no dry sweeping, no high pressure washing, no compressed air and no household vacuum.
- Clean the area with water and detergent, then disinfect. Disinfectant doesn’t work properly on surfaces still covered in droppings.
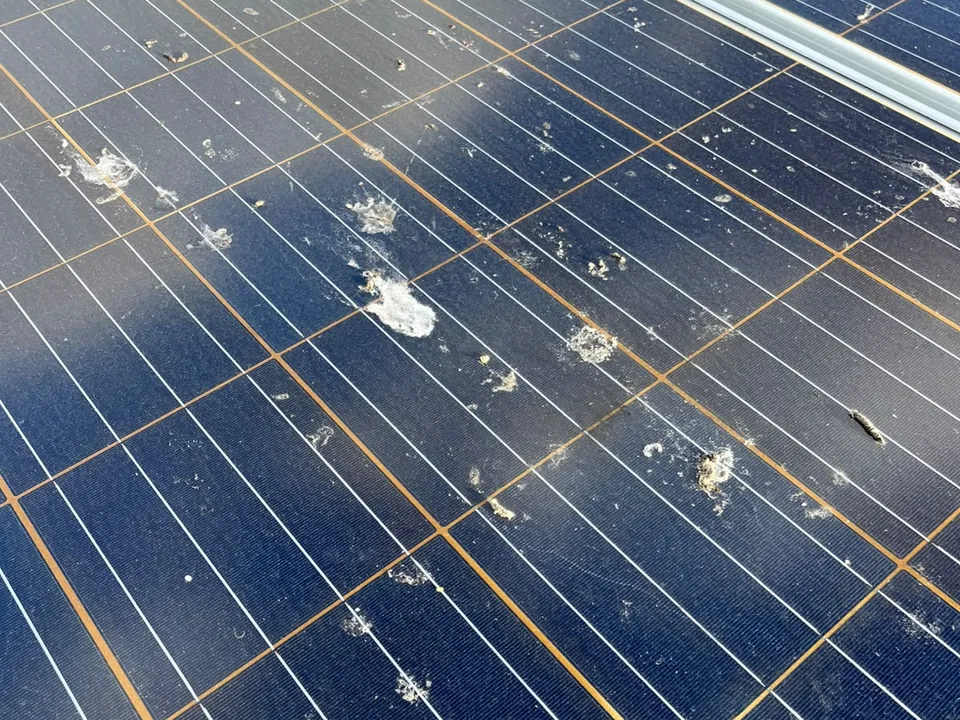
Watch out: Never blast bird droppings off a roof with a pressure washer. It throws the dust into the air you are breathing.
Native birds and the law
In Queensland, the Nature Conservation (Animals) Regulation 2020, section 335, says a person must not tamper with an animal breeding place, which includes a bird’s nest, that is being used by a protected animal, without a reasonable excuse or an authority. The maximum penalty is 165 penalty units.
Protected animals in that framework are native wildlife. Feral pigeons and Indian mynas are introduced species, so they appear not to be covered, but the source doesn’t say so directly. Before you seal the gap:
- Look carefully for any active nest, with eggs or chicks.
- If you aren’t sure what bird it is, or if it is native, stop and contact the Queensland Government’s wildlife team before going further.
Your panel warranty
Drilling into panel frames can void the panel warranty. Damage caused by birds is generally not covered by panel or inverter warranties either, according to Why Solar. Use clip on fixings and check your panel maker’s installation manual.
Working at height
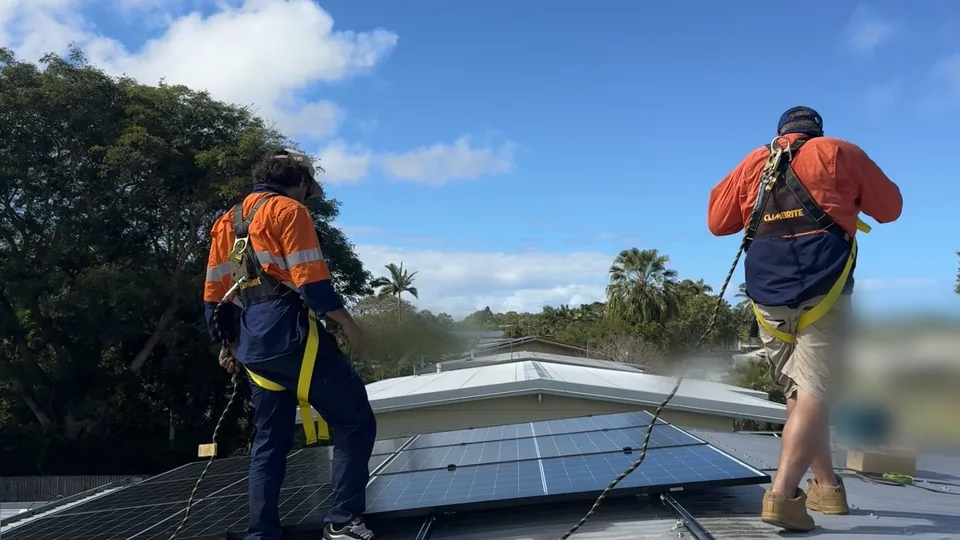
Roof work carries a real risk of falls. Queensland work health and safety rules apply to workers on roofs, and professional installers work under those rules with the right equipment. As a homeowner, ask yourself honestly whether you can work on your roof safely for several hours, bending under the edge of the panels.
Watch out: Two storey homes, steep roofs, tiled roofs, wet or windy days and roofs you are not used to walking on are all reasons to leave it to a professional.
Warranties: manufacturer or installer
There are usually two warranties in a bird proofing job, and it helps to know which is which:
| Warranty | Who gives it | What it covers |
|---|---|---|
| Mesh warranty | The mesh manufacturer, or the installer if they offer one | The mesh itself, for example against rusting through |
| Workmanship warranty | The installer | How it was fitted: clips letting go, gaps, birds getting back in where it was sealed |
A DIY kit gives you the first one at most. With a professional install you should get both, in writing.
DIY or professional: how to decide
| Your situation | Our suggestion |
|---|---|
| Single storey, low pitch metal roof, one small group of panels, no nests | DIY is reasonable if you are confident on a roof |
| Single storey, but lots of droppings and old nests under the panels | Professional, or at least a professional clean first |
| Active nest with eggs or chicks, or a bird you can’t identify | Stop. Check whether it is native before anything else |
| Two storeys or a steep roof | Professional |
| Tiled roof | Professional: the gap under the panels is often bigger and harder to close |
| Several groups of panels, L shapes or steps | Professional, or measure very carefully first |
| Beachfront home | Either way, use 316 stainless. See our corrosion zones guide |
What we do
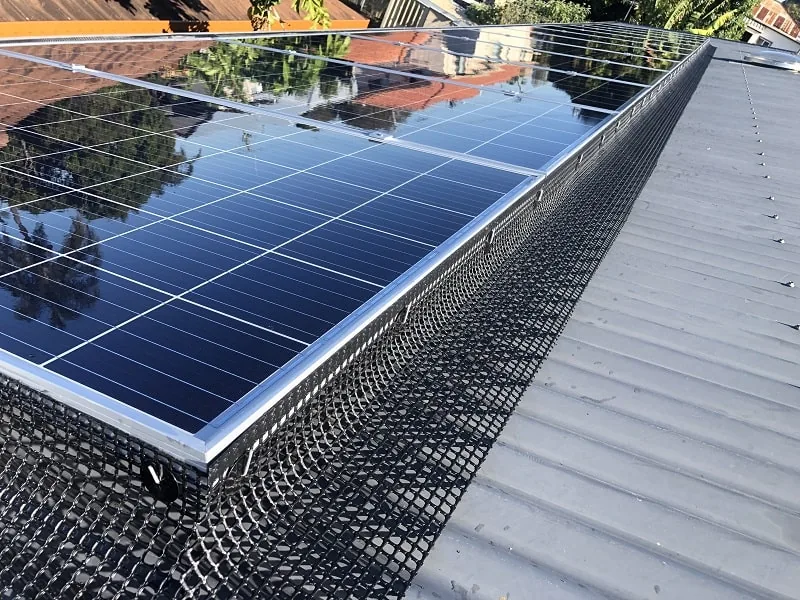
We fit 304 stainless steel mesh with a UV stable PVC coating, clipped to the panel frame, no drilling. Before the mesh goes on, we clear the nests and leaves from under the panels. Our installs come with a 3-year workmanship warranty, plus a 5-year warranty on the mesh. If your home is in the first rows back from the beach, talk to us about the right grade before you book.
You can see your price online before you book, based on how your panels are laid out. We also check your roof on satellite before the visit. If it doesn’t match what you picked, we tell you the new price first, and you can cancel free.
Frequently asked questions
How much does solar panel bird proofing cost in Australia?
DIY kits we checked in October 2026 cost about $80 to $180 for a 30 to 40 m roll. Why Solar puts professional installation at about $350 to $700 for a typical home with 10 to 20 panels, and $700 to $1,200 for 20 to 40 panels.
Is it worth bird proofing solar panels myself?
It can be on a low single storey roof with a small array and no active nests, if you are confident working on a roof. Two storeys, steep or tiled roofs, and a lot of droppings are good reasons to use a professional.
Is it dangerous to clean pigeon droppings from under solar panels?
Dried droppings can carry disease. WorkSafe Queensland advises a light mist of plain or soapy water before cleaning, and no dry sweeping or high-pressure washing. Gloves and a fitted P2 respirator are sensible too.
Can I remove a bird’s nest from under my solar panels?
Not if it is an active nest of a protected native bird. In Queensland that can breach the Nature Conservation (Animals) Regulation 2020. Check what bird it is first, and contact the Queensland Government if you are unsure.
Will bird mesh void my solar panel warranty?
Not if it is clipped on. Drilling into the panel frame can void the warranty. Check your panel maker’s installation manual.
Read next
- Why bird proof your solar panels? A plain English guide
- Rust proof is not stainless: how to choose solar panel bird mesh
- Which bird mesh for your area: coastal corrosion zones explained
- How to install a solar panel bird mesh kit, step by step
- Want the panels cleaned and checked too? A Solar Health Check cleans them and scans every panel with a thermal camera.
Sources
- Why Solar: Solar panel bird proofing in Australia
- WorkSafe Queensland: Work with bird and bat droppings
- WorkSafe Queensland: Psittacosis
- Queensland Government: Species management program information sheet
- Australian retail prices for mesh kits, checked online on 9 October 2026.