
Last updated: October 2026 · Next Phase Solar team
This guide walks you through fitting a solar panel bird mesh kit: the kind with a roll of mesh and a bag of clips. It assumes you have already chosen the right mesh. If not, read how to choose solar panel bird mesh and which grade suits your area first.
Before you start: is this a job for you?
Be honest about the roof. Roof work carries a real risk of falls, and fitting mesh means hours of kneeling and reaching under the edge of the panels.
| Your roof | Do it yourself? |
|---|---|
| Single storey, low pitch metal roof, dry and calm day | Reasonable, if you are confident on a roof |
| Two storeys | No. Use a professional |
| Steep roof | No. Use a professional |
| Tiled roof | Better left to a professional. The gap is often bigger and harder to close |
| Wet, windy or very hot day | Wait for a better day |
Watch out: Never walk or kneel on the solar panels. Work from the roof around them.
Step 1: Check for nests
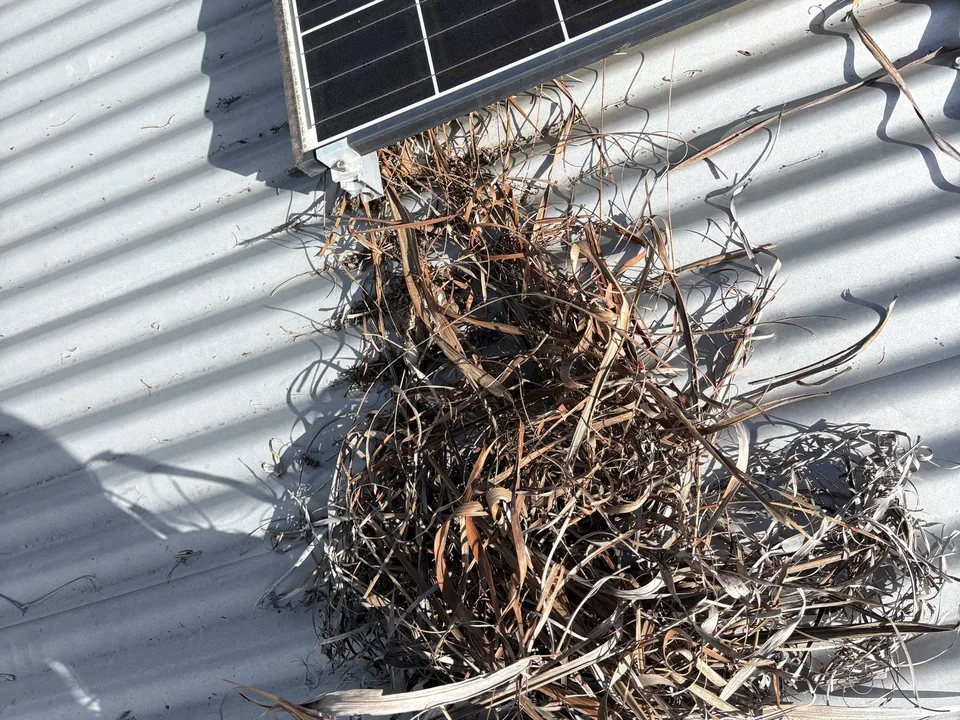
Look under every edge of every panel group before you do anything else.
- If you find an empty old nest, it can be cleared out as part of the clean.
- If you find an active nest with eggs or chicks, stop and work out what bird it is.
In Queensland, the Nature Conservation (Animals) Regulation 2020, section 335, says a person must not tamper with a bird’s nest being used by a protected animal without a reasonable excuse or an authority. The maximum penalty is 165 penalty units. Protected animals are native wildlife. Feral pigeons and Indian mynas are introduced species and appear not to be covered, but the source doesn’t say so directly. If you aren’t sure, contact the Queensland Government’s wildlife team before going further.
Step 2: Clean underneath, safely
Sealing mesh over a mess traps it there. Clean out under the panels first.
Dried bird droppings can carry disease. WorkSafe Queensland’s advice for working with bird and bat droppings:
- Protect yourself. Gloves and a properly fitted P2 respirator or higher.
- Wet it down. Before cleaning, apply a light mist of plain or soapy water to contaminated surfaces and equipment.
- Remove it without raising dust. No dry sweeping, no high-pressure washing, no compressed air, no household vacuum.
- Bag the waste as you go.
- Clean, then disinfect. Wash the area with water and detergent first. Disinfectant doesn’t work on surfaces still covered in droppings.
Tip: This is a good time to clean the panels too, so you seal up a clean array. If you would rather not, a Solar Health Check cleans the panels and scans each one with a thermal camera.
Step 3: Measure your panels
You need enough mesh to go around the outside edge of each group of panels. Not around each panel: around each block.
First, work out which shape you have. These are the same four shapes our online calculator asks about:
| Shape | What it looks like | How to measure |
|---|---|---|
| One block | All panels together in one rectangle | One perimeter: 2 × (width + height) |
| Two blocks | Two separate rectangles | Measure each rectangle and add them |
| Spread out | Three or more separate groups | Measure every group and add them all. Expect more mesh than you think |
| L shape or steps | One group that isn’t a rectangle | Walk the outside edge and measure every side |
One block
One perimeter: 2 × (width + height)
Two blocks
Measure each rectangle and add them
Spread out
Measure every group and add them all
L shape or steps
Walk the outside edge and measure every side
For a rectangle, the perimeter is 2 × (width + height). A common residential panel is roughly 1.1 m wide and 1.9 m long, but panel sizes vary, so measure your own with a tape rather than relying on that.
Tip: Add about 10 % to your total for corners, overlaps at joins and mistakes. A roll of 30 to 40 m usually covers a typical home with 10 to 20 panels in one or two blocks.
Also measure the gap between the roof and the bottom of the panel frame at a few points. Your mesh roll needs to be taller than that gap, with enough left over to fold a flap onto the roof. Rolls come in heights of 150, 200, 205 or 250 mm.
Step 4: Gather your tools
| Tool | What it is for |
|---|---|
| Tin snips or side cutters | Cutting the mesh |
| Pliers | Bending the mesh and closing ties |
| Gloves | Mesh edges are sharp once cut |
| P2 respirator | For the cleaning step |
| Tape measure | Measuring the perimeter and the gap |
| UV rated or stainless cable ties | Corners and joins |
| Spray bottle | Keeping droppings wet while cleaning |
| A safe ladder and non slip footwear | Getting up and moving around safely |
Step 5: Cut and shape the mesh
- Unroll a length for the first side of your first block, a little longer than the side.
- Fold a flap along the bottom edge. Bend the bottom of the mesh outwards, so a strip sits flat on the roof. The flap stops birds pushing under the mesh.
- Check the fit. The top edge should reach the panel frame and the flap should sit flat on the roof. On corrugated metal, the flap should follow the profile as closely as you can.
- Panel frame
- Mesh
- Flap, flat on the roof
- Clip
Watch out: Cut ends of mesh are sharp. Wear gloves the whole time and turn cut ends inwards so they face the panel, not the open roof.
Step 6: Clip the mesh to the panel frame
Kits usually come with about 100 clips for every 30 m of mesh. That works out at roughly one clip every 30 cm, which is a good spacing to aim for.
- Start at a corner. Fit the first clip close to the corner.
- Hook the clip onto the edge of the panel frame, push the mesh against the frame and lock it on with the washer or catch, following the kit instructions.
- Work along the side, a clip about every 30 cm, keeping the mesh straight and tight against the roof.
- Add an extra clip anywhere the mesh wants to lift away from the frame.
Watch out: Don’t drill into the panel frame or the roof to fix the mesh. Drilling the frame can void your panel warranty. Check your panel maker’s installation manual if you are unsure.
Step 7: Corners and joins
Corners and joins are where birds get back in, so take your time here.
- Corners: cut the mesh at the corner, overlap the two pieces by a few holes and tie them together with UV rated or stainless cable ties. No gap at the bottom.
- Joins: where one length runs out, overlap the next by at least a few holes and tie them along the overlap.
- Ties: plastic ties that aren’t UV rated go brittle in the sun. Use UV rated or stainless ones.
Step 8: Leave room for water and air
Mesh should keep birds out, not water in.
- Don’t block drainage paths on the roof under the panels. Leaves and water need to get out.
- Don’t stuff the gap with anything other than mesh. The panels need air underneath to stay cool.
- Leave cables free. Don’t clip or tie the mesh to the solar cables.
Step 9: Check your work
Walk around the whole array:
- Look for gaps at the bottom, at corners and at joins. If you can fit a finger through a gap, a bird can push through it in time.
- Tug gently on the mesh between clips. It shouldn’t lift away from the frame.
- Pick up all offcuts and loose ties from the roof and gutters.
Step 10: Keep an eye on it
- After every big storm, look at the mesh from the ground with binoculars. In cyclone areas this matters even more. Look for lifted mesh and missing clips, especially at corners.
- Once a year, check the clips and ties up close if it is safe to do so.
- If birds are back, find the gap quickly and close it before they rebuild.
Common mistakes
| Mistake | What happens | How to avoid it |
|---|---|---|
| Sealing over droppings and nests | The mess stays there, and smells | Clean first, wet, with a P2 respirator |
| Mesh too short for the gap | Birds get in over the top or under the bottom | Measure the gap and buy the right roll height |
| No flap on the roof | Birds push under the mesh | Fold a flat flap along the bottom edge |
| Too few clips | The mesh lifts in wind | About one clip every 30 cm, more where it lifts |
| Plastic ties that aren’t UV rated | Corners open up after a summer or two | Use UV rated or stainless ties |
| Drilling the frame | Can void the panel warranty | Use clip on fixings only |
| Galvanised or plain steel near the sea | Rust and orange streaks | Use 304, or 316 within about 5 km of the surf |
When to call a professional
Stop and get help if:
- the roof is two storeys, steep, tiled or fragile;
- there is an active nest and you don’t know what bird it is;
- there is a large build up of droppings under the panels;
- your panels are in several groups or odd shapes and you aren’t sure how much mesh you need;
- you start and find you can’t work safely.
What we do
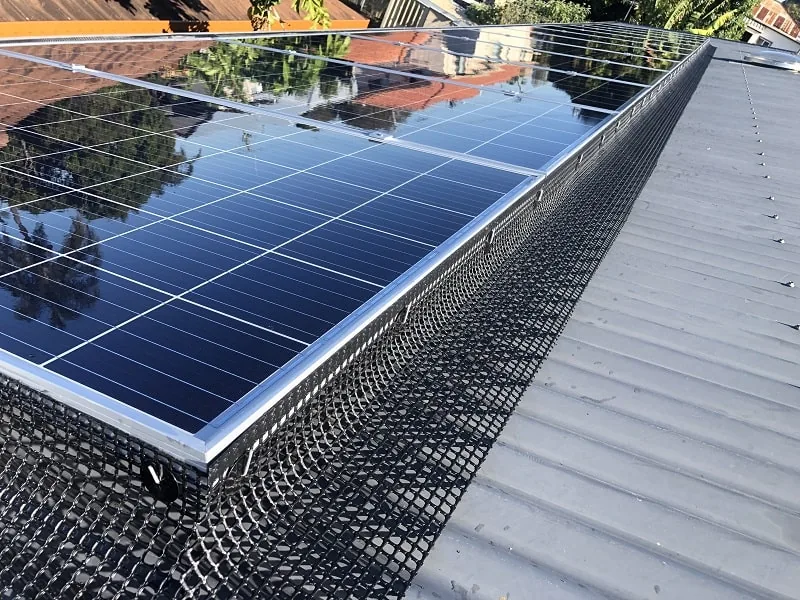
We fit 304 stainless steel mesh with a UV stable PVC coating, clipped to the panel frame, no drilling, and we clear the nests and leaves from under the panels first. Our installs come with a 3-year workmanship warranty, plus a 5-year warranty on the mesh. If your home is in the first rows back from the beach, talk to us about the right grade before you book.
Frequently asked questions
How much mesh do I need for my solar panels?
Measure around the outside edge of each group of panels, not each panel, and add about 10 % for corners and joins. A 30 to 40 m roll usually covers a typical home with 10 to 20 panels.
How far apart should bird mesh clips be?
About one clip every 30 cm. Kits usually include around 100 clips per 30 m of mesh, which works out at that spacing. Add extra clips where the mesh lifts.
Do I need to clean under the panels before fitting mesh?
Yes. Otherwise you seal the nests and droppings in. Wet the droppings first, wear gloves and a P2 respirator, and don’t dry sweep or pressure wash.
Can I install bird mesh on a two storey house myself?
We don’t recommend it. Two storey and steep roofs carry a much higher fall risk and need proper access and fall protection.
Will bird mesh stop my panels from cooling?
Not if it is fitted properly. Mesh lets air through. Don’t block drainage paths or pack the gap with anything else.